Bank Reconciliation
One of the critical functions in keeping the books of the Church includes reconciling the records in Church Windows with the actual statements you receive from your bank for each cash (checking / savings, etc.) account. The Accounting Module even includes a wizard that can assist if there are problems with the reconciliation.
Note:
If you are just starting to use this Module, you may have deposits in transit or outstanding checks from your reconciliation on your prior system. To enter this information click Special Functions and choose Prior System Checks.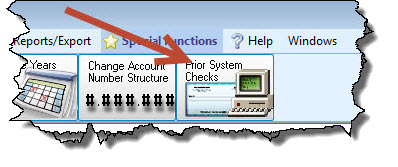
To access the Bank Reconciliation screen:
- From The Initial Portal of Church Windows choose Accounting
- Click Special Functions
- Then click the Bank Rec. icon:
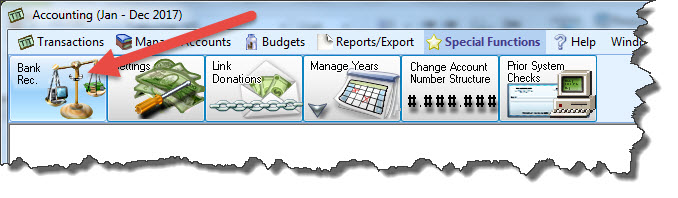
- This will open the Bank Reconciliation screen:

Account tab
- Select an Asset Account to reconcile from the
 dropdown.
 - Then use the
 radio button to choose between Begin a new Bank Reconciliation or Select a Saved Bank Reconciliation to continue working with one that has already been started.
 - Clicking on the dropdown of Select a Saved Bank Reconciliation will display the dates of all prior completed or in process reconciliations.
- When you're finished, click the → Next button.
- From this point forward, you can click the ← Back button to return to the previous screen and discard your entries.
- At the bottom of the screen is dynamic balancing information between the bank statement and books, at the time.
 Statement Tab
If this is your first bank reconciliation, the beginning balance field will be 0.00 otherwise it is based on the prior month's ending balance: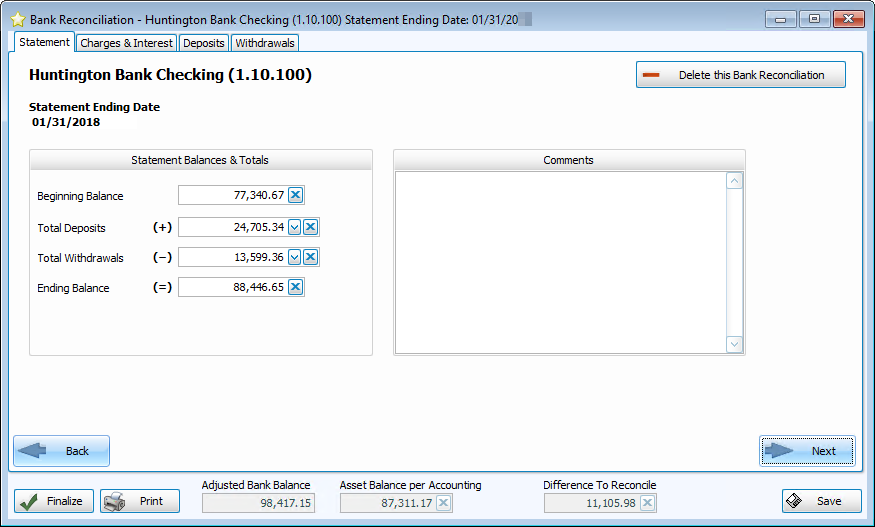
- On the actual statement from your bank, locate the summary information for the month’s activity and enter it into the fields for Total Deposits, Total Withdrawals, and Ending Balance.
- A red circle with the exclamation point
 will flash to the right of "Statement Balances & Totals" until the math for the entries is correct.
 - With correct entries, when you tab off the ending balance the icon will disappear.
- Also on this screen, there is the option at the top right to
 delete a bank reconciliation if you want to start over with that month’s reconciliation.
 - There is a Comments box where notations about activity or unusual items can be recorded.
- The only time this screen would immediately show a reconciled balance would be if no items cleared the bank and every item on the bank statement was already recorded on the books.
- When you're finished, click the → Next button.
For example, information about a redeposit of a returned item or a deposit in transit might be recorded there.
Charges & Interest tab
Frequently, there are bank charges or interest which are not known until the bank statement is received. Those items can be entered and posted on this tab: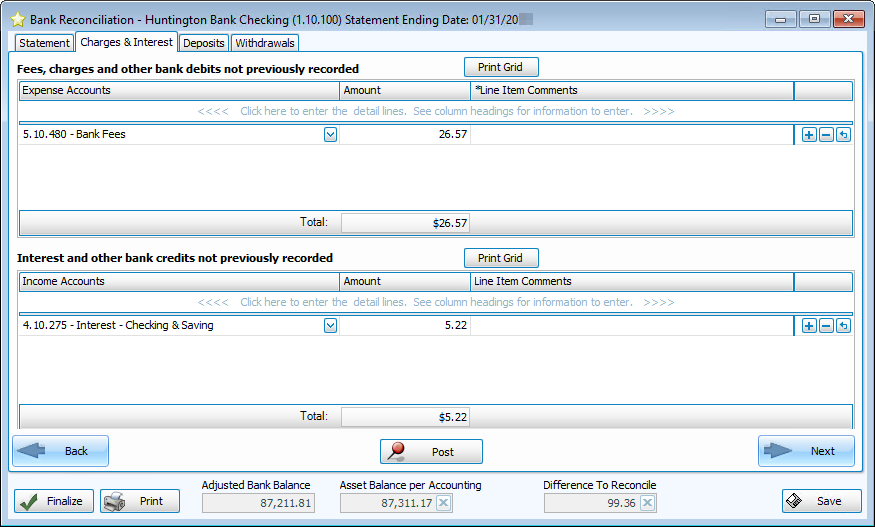
- Debits (fees, charges, etc.) are entered in the top half of the screen.
- Credits (Interest, etc.) are entered in the bottom half.
- To add fees or interest, click the blue text:
<<<< Click here to enter the detail lines. See column headings for information to enter. >>>> - Click Post after entering all of these transactions from your bank statement.
- These items will automatically be marked as cleared in the Deposits and Withdrawals tabs.
- When you're finished, click the → Next button.
Deposits tab
Here you will see all of the Deposits that you have entered into Church Windows Accounting.
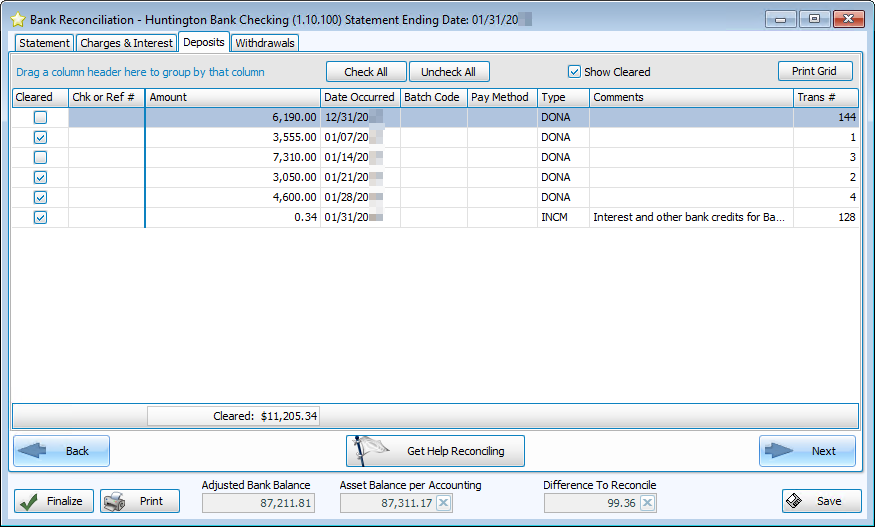
- Mark as cleared all the checks, cash, electronic deposits, etc. that appear on your actual bank statement for the selected account.
- When clearing deposits you can click the Check All or Uncheck All button to speed your entry.
- You can also opt to exclude from the screen, entries already marked as cleared by unchecking the Show Cleared box at the top right.
- Click the Print Grid grid to print the transactions you are viewing; a Print Preview will open where you can click the
 printer icon in the top left to send the document to your printer.
Withdrawals tab
The Withdrawals tab is similar to the Deposits tab.
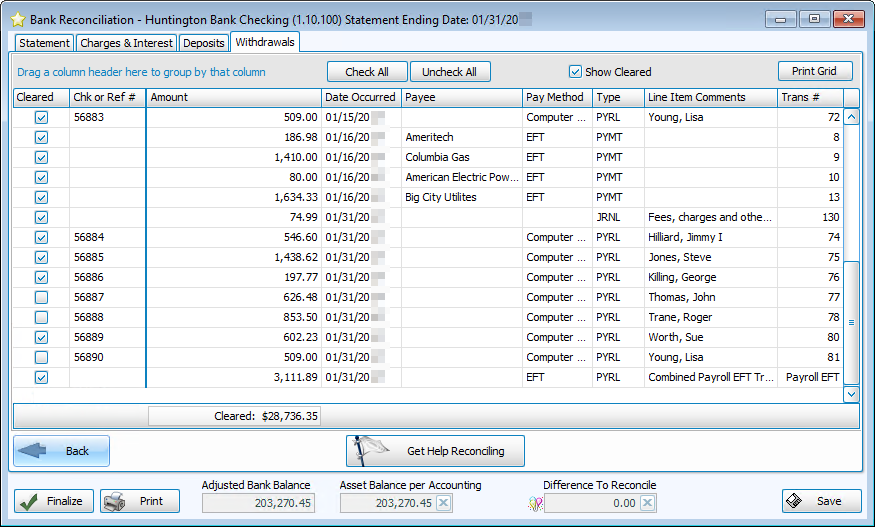
- Mark as cleared all the checks, electronic withdrawals, etc. that appear on our bank statement.
- When clearing withdrawals you can click the Check All or Uncheck All button to speed your entry.
- You can also opt to exclude from the screen, entries already marked as cleared by unchecking the Show Cleared box at the top right.
- Click the Print Grid grid to print the transactions you are viewing; a Print Preview will open where you can click the printer icon in the top left to send the document to your printer.
Get Help Reconciling
If there is a difference to reconcile, we may want to click the Get Help Reconciling button:

- The Help — Deposit Comparison tab and the Help — Withdrawal Comparison tab will each provide us with the total difference for withdrawals and deposits respectively. This may be sufficient to find the discrepancy:
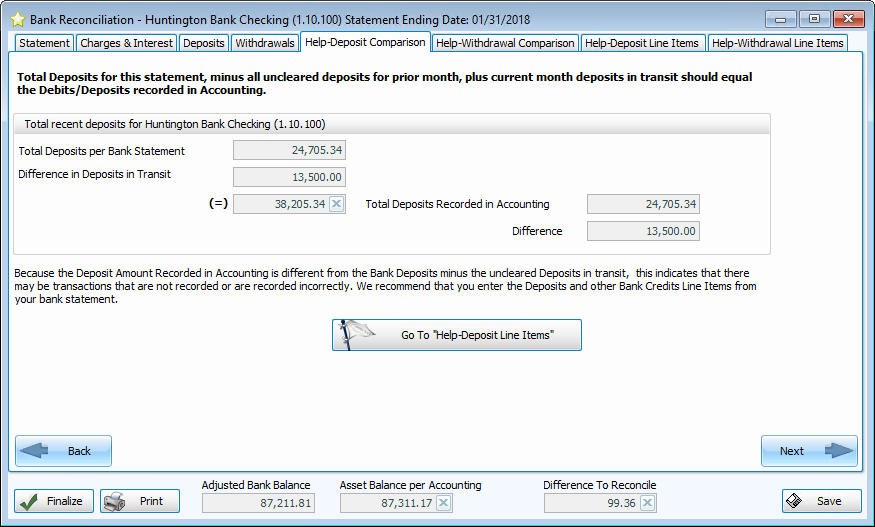
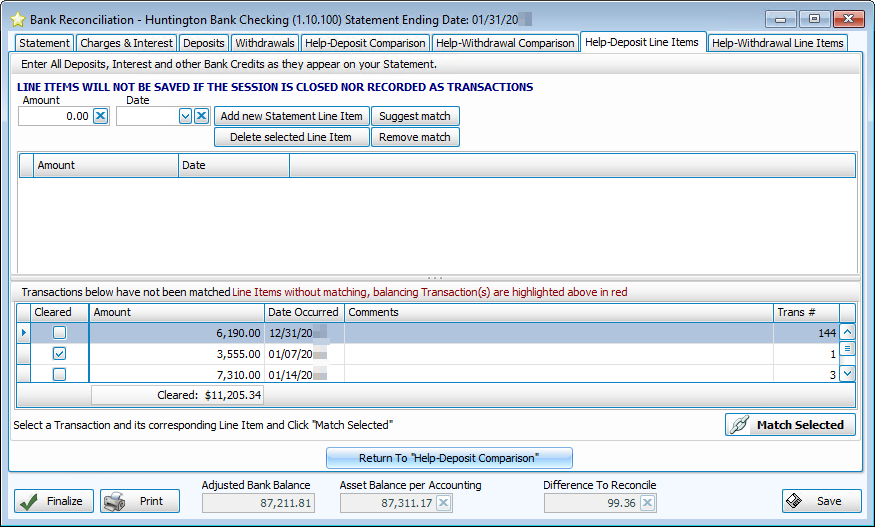
- If not, we can go to the Help — Deposit Line Items tab, the Help — Withdrawal Line Items, or click the Go To "Help-Deposit/Withdrawal Line Items" button to get to the respective tab:
OR
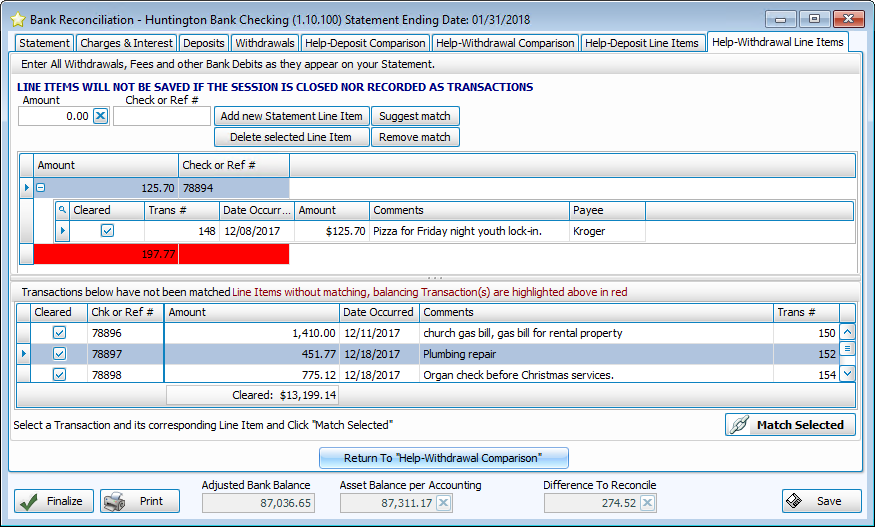
- On this tab, we enter each outgoing check or withdrawal shown on the bank statement, then click Add new Statement Line Item.
- Entries that do not produce an exact match will appear highlighted in red.
- We can click Suggest Match.
- Then we can examine and match items that might be related, but perhaps the amount on the books and the amount that cleared the bank are slightly different. It could be that check numbers for two checks somehow got reversed.
- Just as Help — Withdrawal Line Items, the Help — Deposit Line Items tab compares each entry from the bank statement to those deposits recorded in Church Windows Accounting.
Once we have resolved all the differences between our records in Accounting and the bank statement, the Difference To Reconcile shows 0.00 with  balloons next to the box:
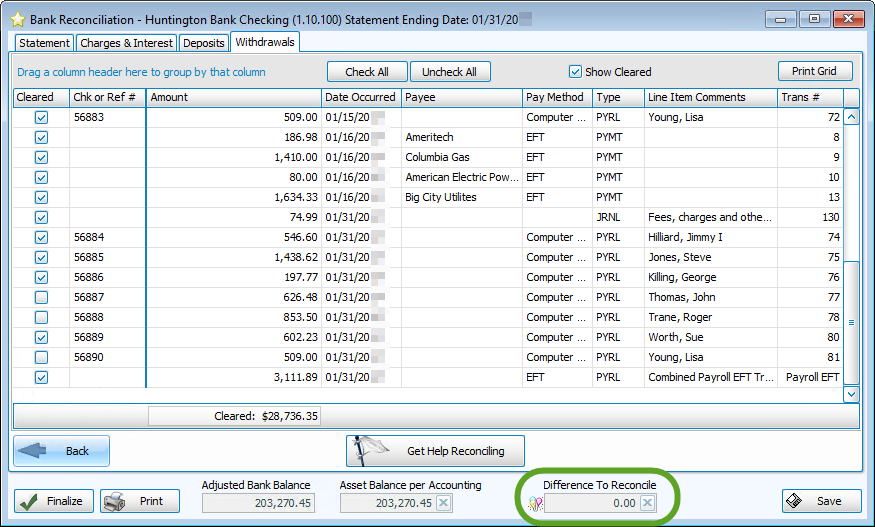
Then we click the Finalize button in the bottom left to complete the process. Finalized bank reconciliations cannot be edited. It is also important to finalize bank reconciliations to help find potential problems with future bank reconciliations.
If someone makes a change in the books for a date in a cash account that has already been reconciled for the month, the Get Help Reconciling tabs will include an additional tab which shows the entries that were entered after the reconciliation was finalized.
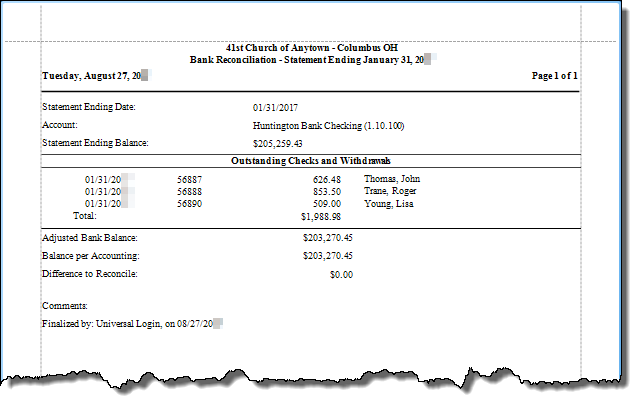
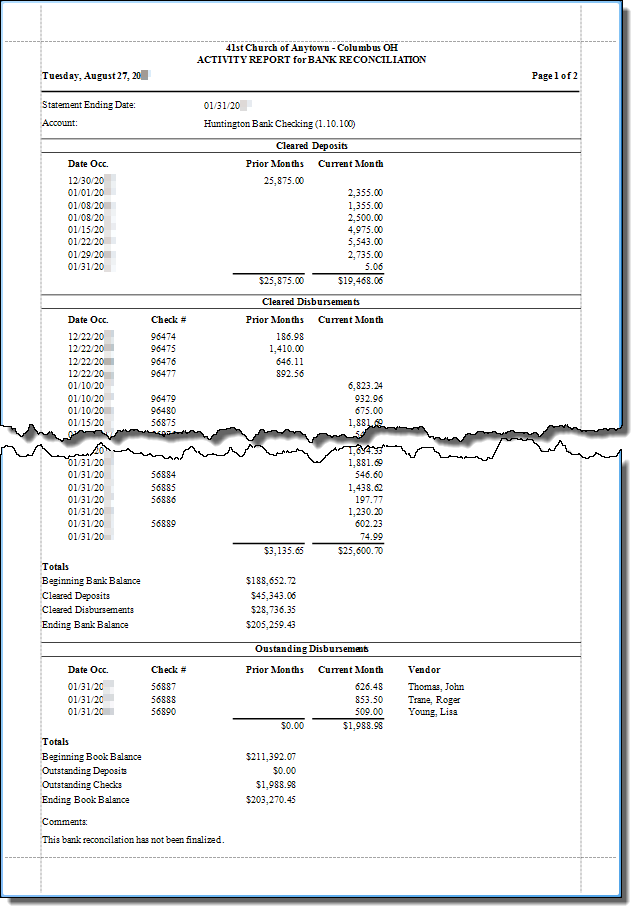
You also have the option to print your Bank Reconciliation, just click the Print button and choose either:
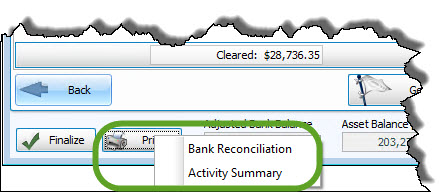
Bank Reconciliation Report options:
Both reports offer the same choices on the Options tab, but they will yield different reports.
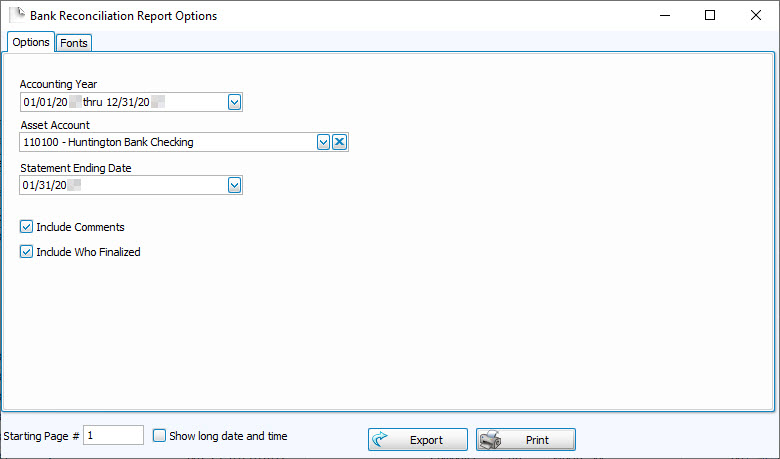
Options tab
- Accounting Year —
Choose the desired year from the dropdown box. - Asset Account —
Click the dropdown box to choose the desired account from the list of Assets. - Statement Ending Date —
Choose the desired Bank Reconciliation date from the dropdown. - Include Comments —
Check this box if you want any comments you entered to be printed. - Include Who Finalized —
Check this box if you want the report to include the name of the Users who finalized the Bank Reconciliation.
Change the size and style of the font that prints on the report.
Once you have made all of your selections, click Print to view a Print Preview and then proceed in sending the file to your printer. You can also Export most reports and/or Send via Email as a file to be used outside of Church Windows.